Telling a Story with Original Prints

I admire my friends who do plein air. They go out and just spontaneously paint. There is very little about a drypoint print that could be considered spontaneous. That being said, it doesn’t have to be a means to a cold, black and white end.

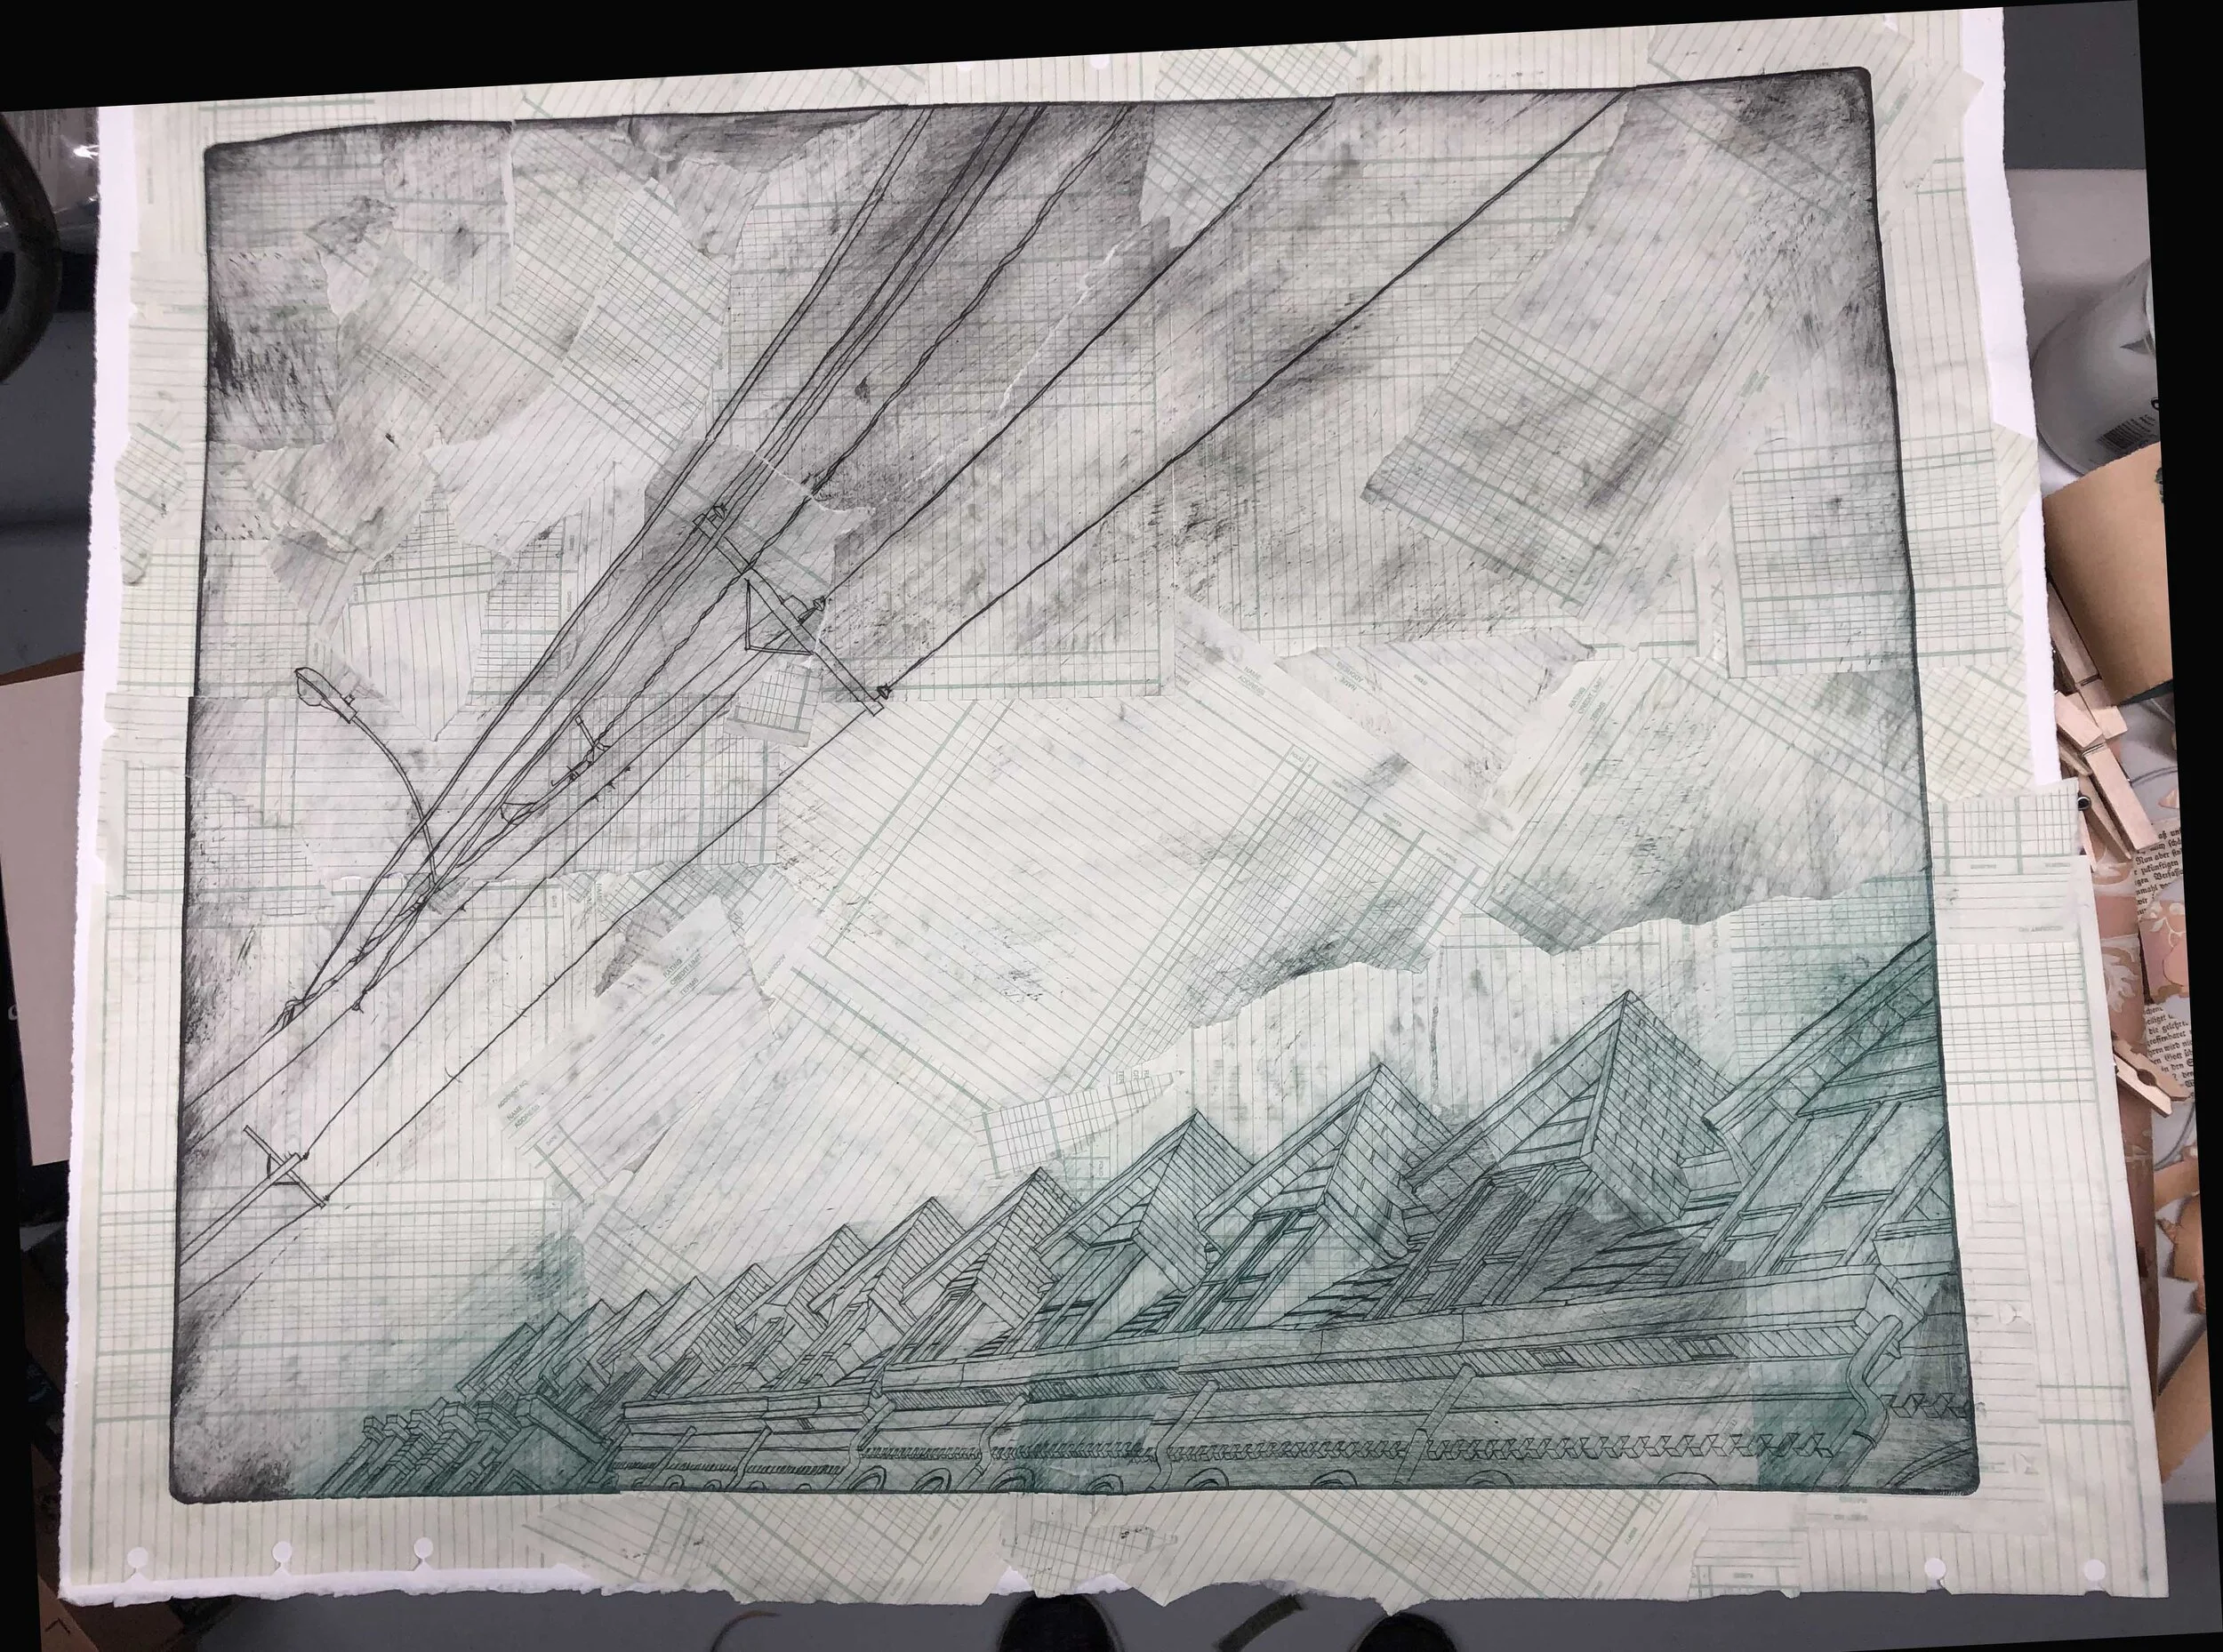
Leaning Rowhouses [green]

Leaning Rowhouses [green]

I did a residency at Remarque New Grounds Print Workshop in Albuquerque in February 2019. I had my drypoint plates already done since they were large and took days to etch, and when I got there I printed like a fiend, which I think drove my whole cohort crazy. Then I shipped everything home and thought about it for several months.

When I first tried my hand at printmaking, I took a little six week class in traditional etching, and we were taught to make multiples that needed to look as much alike as possible. Boring. So in the years since, I have looked for new ways to approach printmaking that would be more flexible. Not quite plein air, but certainly not a series of pieces all just alike.

I like to think of printmaking as a way to tell a story with a different ending each time. Let me show you.

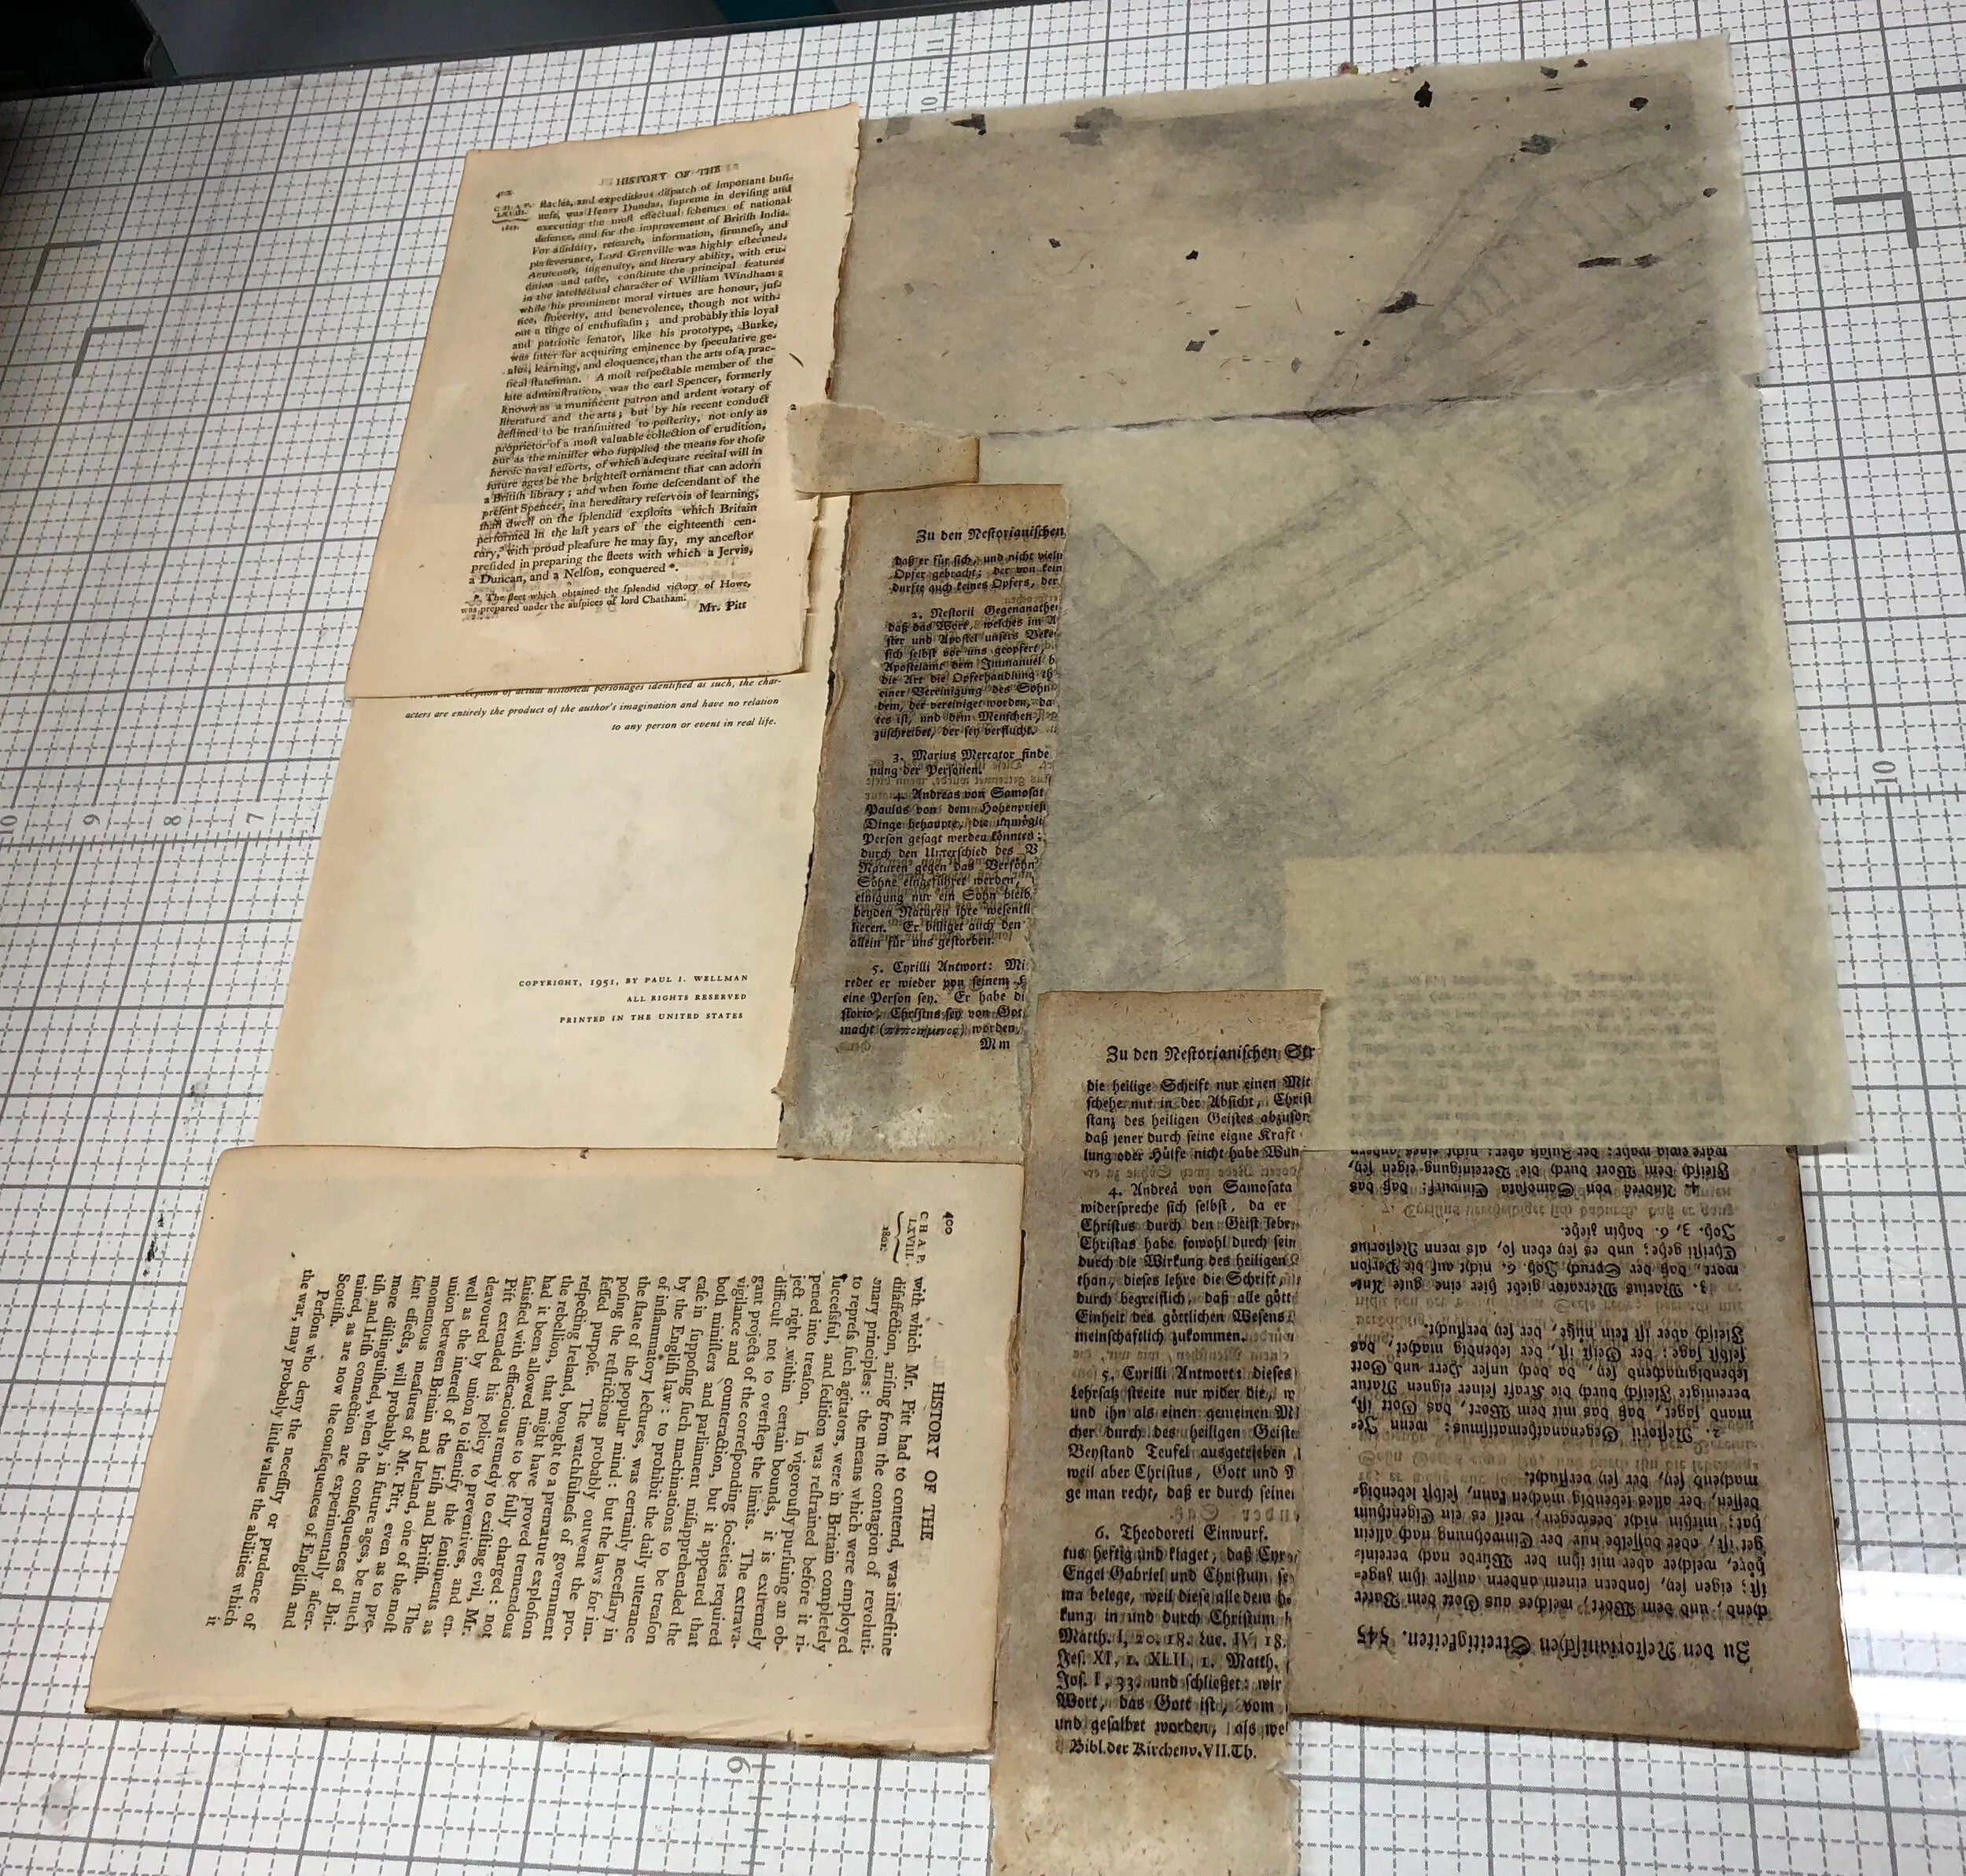
Drypoint collage in progress

Drypoint collage in progress

I did this plate while I was at Remarque. It was a line of rowhouses with power lines running alongside, which I had photographed from an odd angle. I did a number of prints of this plate, among which were a series in deep red ink on cream and pink found papers and wallpaper, and a series in green and black inks on green ledger paper.

Old books, vintage wallpaper, and Goodwill finds are some of my favorite things.

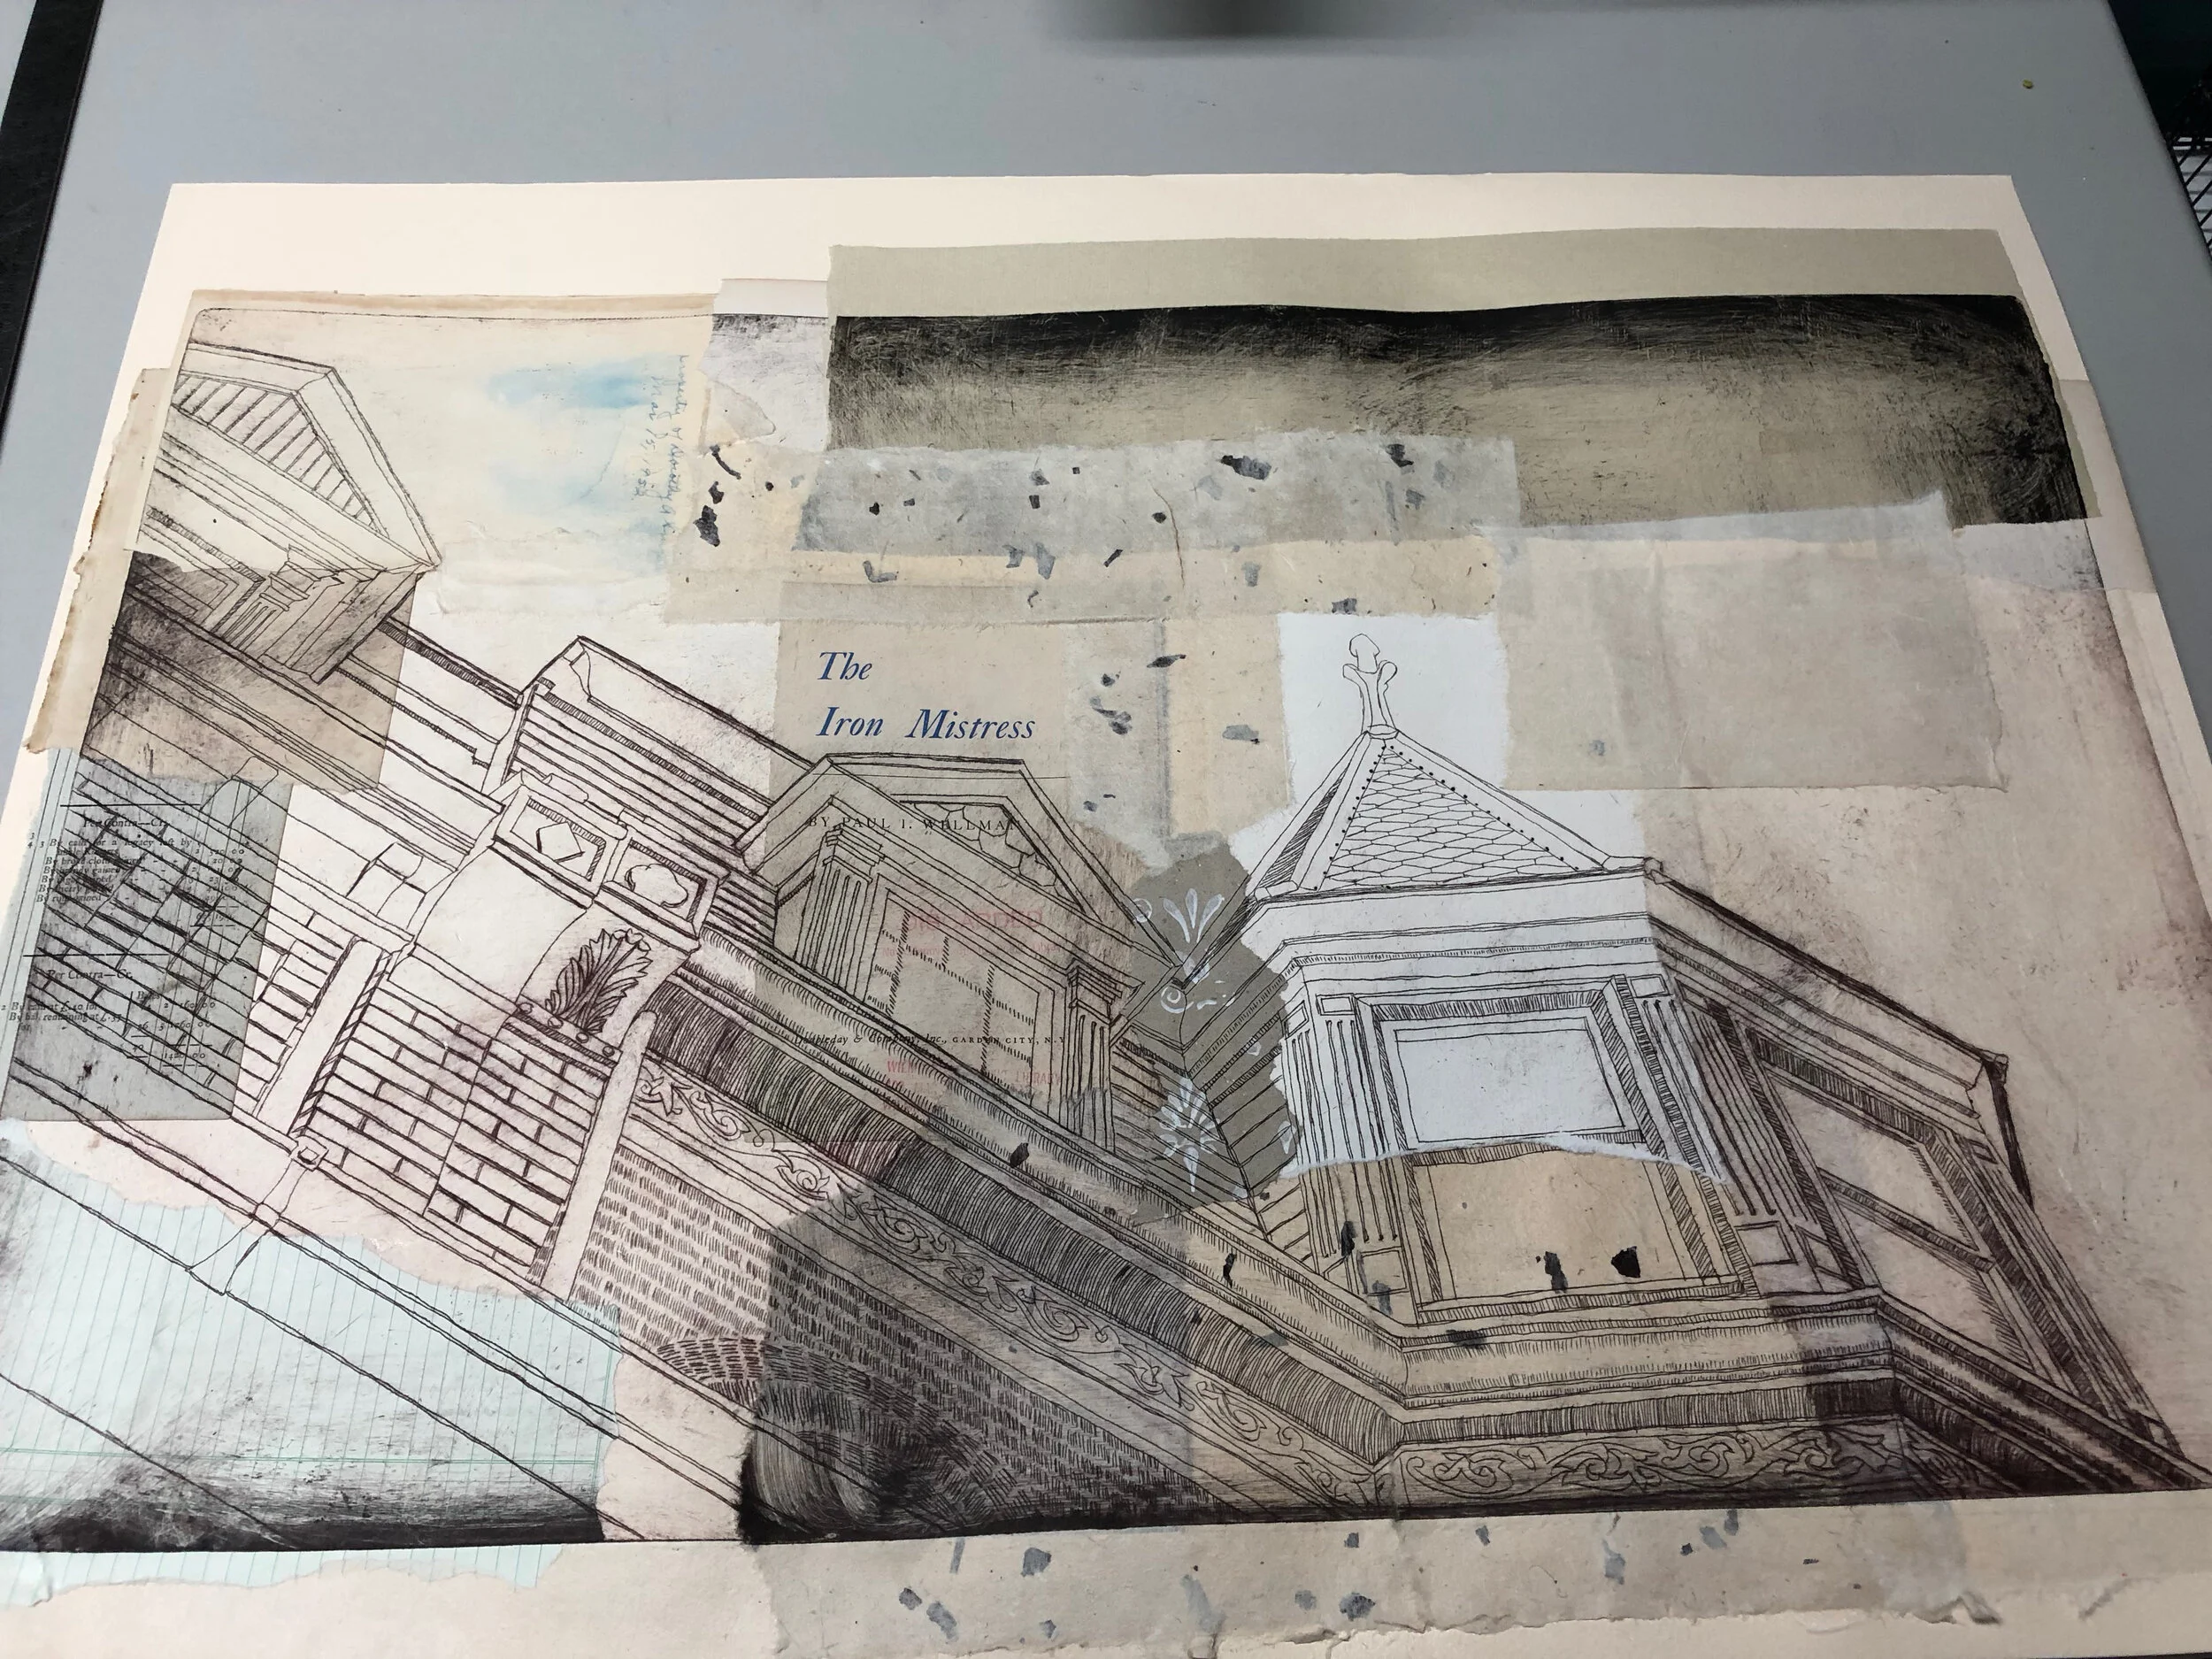
After several months of beneficial rumination, I took out my pieces and composed two versions of the plate. [more to come]

Green Rowhouse in progress smaller.jpg

At the top of this photo you can see a plain print of the plate in black ink on a single sheet of paper. This is my key image, which allows me to fit the collage pieces together on top. That image gets fully covered in the collage process. Then I have a lot of little pieces that have bits of the overall image printed on them, and these will be composed and collaged together.

Once the collage is completed, I go into it with watercolor, acrylic, or colored pencil to bring out features I want to emphasize. In previous ones, everything was covered in clear acrylic so they could be framed without glass, but these I made without the acrylic coating.

The finished pieces in this method are all very unique, and though not as spontaneous as plein air, for me they tell the same story, each one with its own ending. I like that.

Leaning Rowhouses [pink]

Leaning Rowhouses [pink]

See Leaning Rowhouses [green] on its gallery page to learn more.
See Leaning Rowhouses [pink] on its gallery page to learn more.


Drypoint - Variations on a Classic Printmaking Technique

I love to experiment with printmaking. Never having been very good at following the rules for making an edition, I have the most fun when I stray from the norm, as I did with these collaged drypoint prints.

Rust Belt Row Houses 2/4 VE, by Natalie Schorr 2018

Rust Belt Row Houses 2/4 VE, by Natalie Schorr 2018

I wanted to do some printmaking pieces based on photos I took over the summer of some favorite Rust Belt cities. Industrial sites and old row houses are ubiquitous in these areas, and they bring back memories of the years I lived in Pittsburgh. I also wanted to recapture the feeling of a memory, where things are a little fuzzy, pieced together, and imperfect; more the soul of the memory than the accuracy of the reality.

I started with a drawing from a photo, which allowed me to work out the details and make a few edits. The drawing was made to the size I wanted the final piece to be. I chose a fairly extreme upward angle, a sort of child's point of view. Then I got a couple of pieces of clear acrylic, neither of which was large enough to do the entire piece, but each large enough to do more than half the piece.

I placed my first clear acrylic sheet over the drawing I had made. Using diamond point and carbide scribes, I simply scratched my image into the surface of the acrylic. No solvents, acids, or hazardous fumes. Just scratching. That's the beauty of drypoint. It's something you can walk away from and come back to anytime, with no worry that you will mess something up. It's really low tech.

Inked acrylic drypoint plate drawn without a straightedge

Inked acrylic drypoint plate drawn without a straightedge

After I finished my first drypoint plate, I put down the second piece of acrylic and did the same. This meant there were areas of the total image that were drawn on both plates; however, they were not exactly the same, just approximately. I also did my drypoint using no straight edges, which meant that lines got pretty wavy, contributing to the memory aspect I wanted to achieve. 

Using acrylic plates for drypoint has both advantages and disadvantages. One advantage of acrylic is that it's transparent, so you can place it right over your drawing, eliminating the need to transfer your image to the plate. Another big advantage to using acrylic is that it's a whole lot cheaper than using a copper or zinc plate. The main disadvantage is that it doesn't really push up much of a burr to catch the ink, so you don't really get the fuzzy line that you get when doing a drypoint in metal. The result is a little cleaner, more like an etching without all the annoying toxic stuff.

Once I was happy with my plates, I launched into the printing. I used Akua Intaglio Inks, mostly Red Oxide and Carbon Black, with a couple of other colors thrown in. The goal was for the plates to be not inked in the same colors throughout the series, so I just mixed things together somewhat irregularly, but keeping with the sort of rusty brown theme.

Acrylic drypoint plate laid out with scraps of paper and ephemera

Acrylic drypoint plate laid out with scraps of paper and ephemera

I printed each plate multiple times using all sorts of paper scraps. Sometimes I printed the plate on a single sheet, but mostly they were printed on multiple sheets, incorporating pages of old books, vintage wallpaper, and handwritten ephemera into the mix.

Piles of partial drypoint image impressions, ready for collaging

Piles of partial drypoint image impressions, ready for collaging

Once I had a big pile of image pieces, I began the collaging process. It's good to note that you will want to have at least twice the number of printed pieces as you will have finished collages, as you need that many to have enough to compose what you want. So for my 4 finished collages, I actually printed my plates 8-9 times each.

I used a backing sheet and arranged and glued each composition using heavy acrylic medium. Because it has less water, it makes a good adhesive that doesn't swell the fibers in the papers.

Collage showing variations resulting from different papers, ink colors, and plate tone

Collage showing variations resulting from different papers, ink colors, and plate tone

Once the collages were done, I primed each piece with clear acrylic on top, and colored them with thin washes of acrylic paint, being mindful to let the drypoint show through. Each piece was done differently, but kept within the color scheme I liked best from a Pinterest board I made to establish the dominant colors of the area.

Rust Belt Row Houses 2/4 VE
Rust Belt Row Houses 4/4 VE