I love to experiment with printmaking. Never having been very good at following the rules for making an edition, I have the most fun when I stray from the norm, as I did with these collaged drypoint prints.

Rust Belt Row Houses 2/4 VE, by Natalie Schorr 2018
I wanted to do some printmaking pieces based on photos I took over the summer of some favorite Rust Belt cities. Industrial sites and old row houses are ubiquitous in these areas, and they bring back memories of the years I lived in Pittsburgh. I also wanted to recapture the feeling of a memory, where things are a little fuzzy, pieced together, and imperfect; more the soul of the memory than the accuracy of the reality.
I started with a drawing from a photo, which allowed me to work out the details and make a few edits. The drawing was made to the size I wanted the final piece to be. I chose a fairly extreme upward angle, a sort of child's point of view. Then I got a couple of pieces of clear acrylic, neither of which was large enough to do the entire piece, but each large enough to do more than half the piece.
I placed my first clear acrylic sheet over the drawing I had made. Using diamond point and carbide scribes, I simply scratched my image into the surface of the acrylic. No solvents, acids, or hazardous fumes. Just scratching. That's the beauty of drypoint. It's something you can walk away from and come back to anytime, with no worry that you will mess something up. It's really low tech.

Inked acrylic drypoint plate drawn without a straightedge
After I finished my first drypoint plate, I put down the second piece of acrylic and did the same. This meant there were areas of the total image that were drawn on both plates; however, they were not exactly the same, just approximately. I also did my drypoint using no straight edges, which meant that lines got pretty wavy, contributing to the memory aspect I wanted to achieve.
Using acrylic plates for drypoint has both advantages and disadvantages. One advantage of acrylic is that it's transparent, so you can place it right over your drawing, eliminating the need to transfer your image to the plate. Another big advantage to using acrylic is that it's a whole lot cheaper than using a copper or zinc plate. The main disadvantage is that it doesn't really push up much of a burr to catch the ink, so you don't really get the fuzzy line that you get when doing a drypoint in metal. The result is a little cleaner, more like an etching without all the annoying toxic stuff.
Once I was happy with my plates, I launched into the printing. I used Akua Intaglio Inks, mostly Red Oxide and Carbon Black, with a couple of other colors thrown in. The goal was for the plates to be not inked in the same colors throughout the series, so I just mixed things together somewhat irregularly, but keeping with the sort of rusty brown theme.
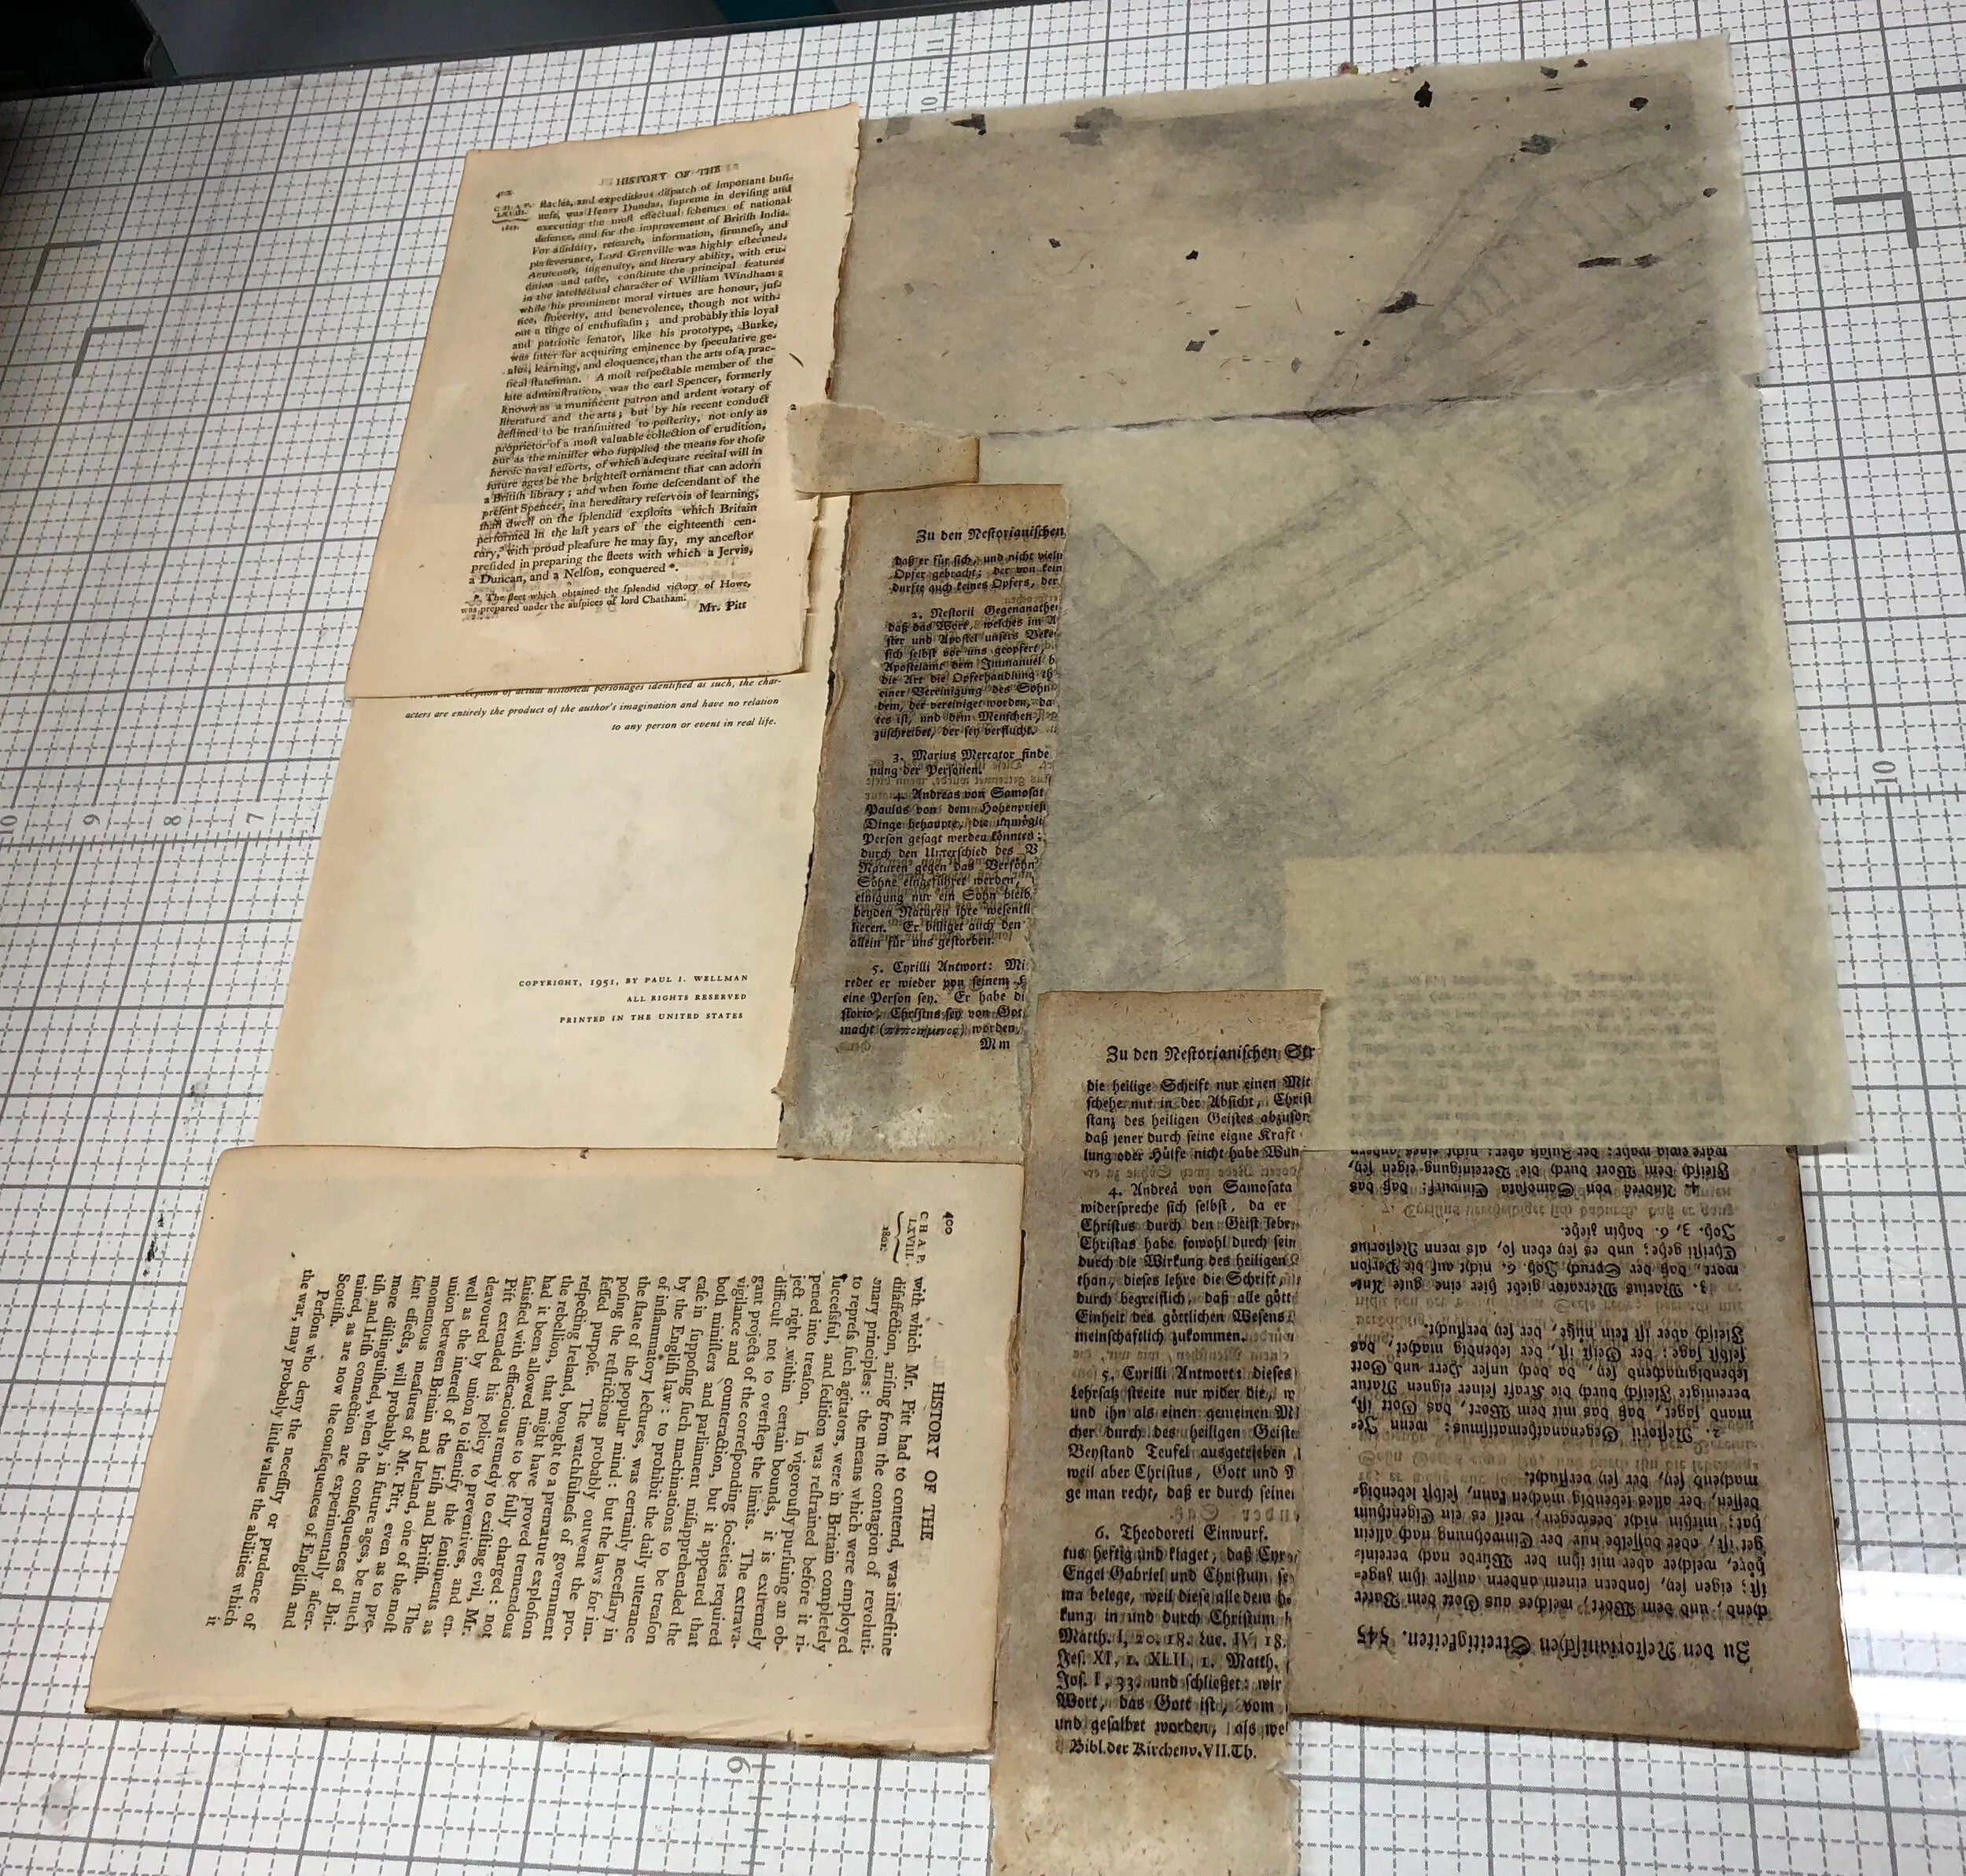
Acrylic drypoint plate laid out with scraps of paper and ephemera
I printed each plate multiple times using all sorts of paper scraps. Sometimes I printed the plate on a single sheet, but mostly they were printed on multiple sheets, incorporating pages of old books, vintage wallpaper, and handwritten ephemera into the mix.

Piles of partial drypoint image impressions, ready for collaging
Once I had a big pile of image pieces, I began the collaging process. It's good to note that you will want to have at least twice the number of printed pieces as you will have finished collages, as you need that many to have enough to compose what you want. So for my 4 finished collages, I actually printed my plates 8-9 times each.
I used a backing sheet and arranged and glued each composition using heavy acrylic medium. Because it has less water, it makes a good adhesive that doesn't swell the fibers in the papers.
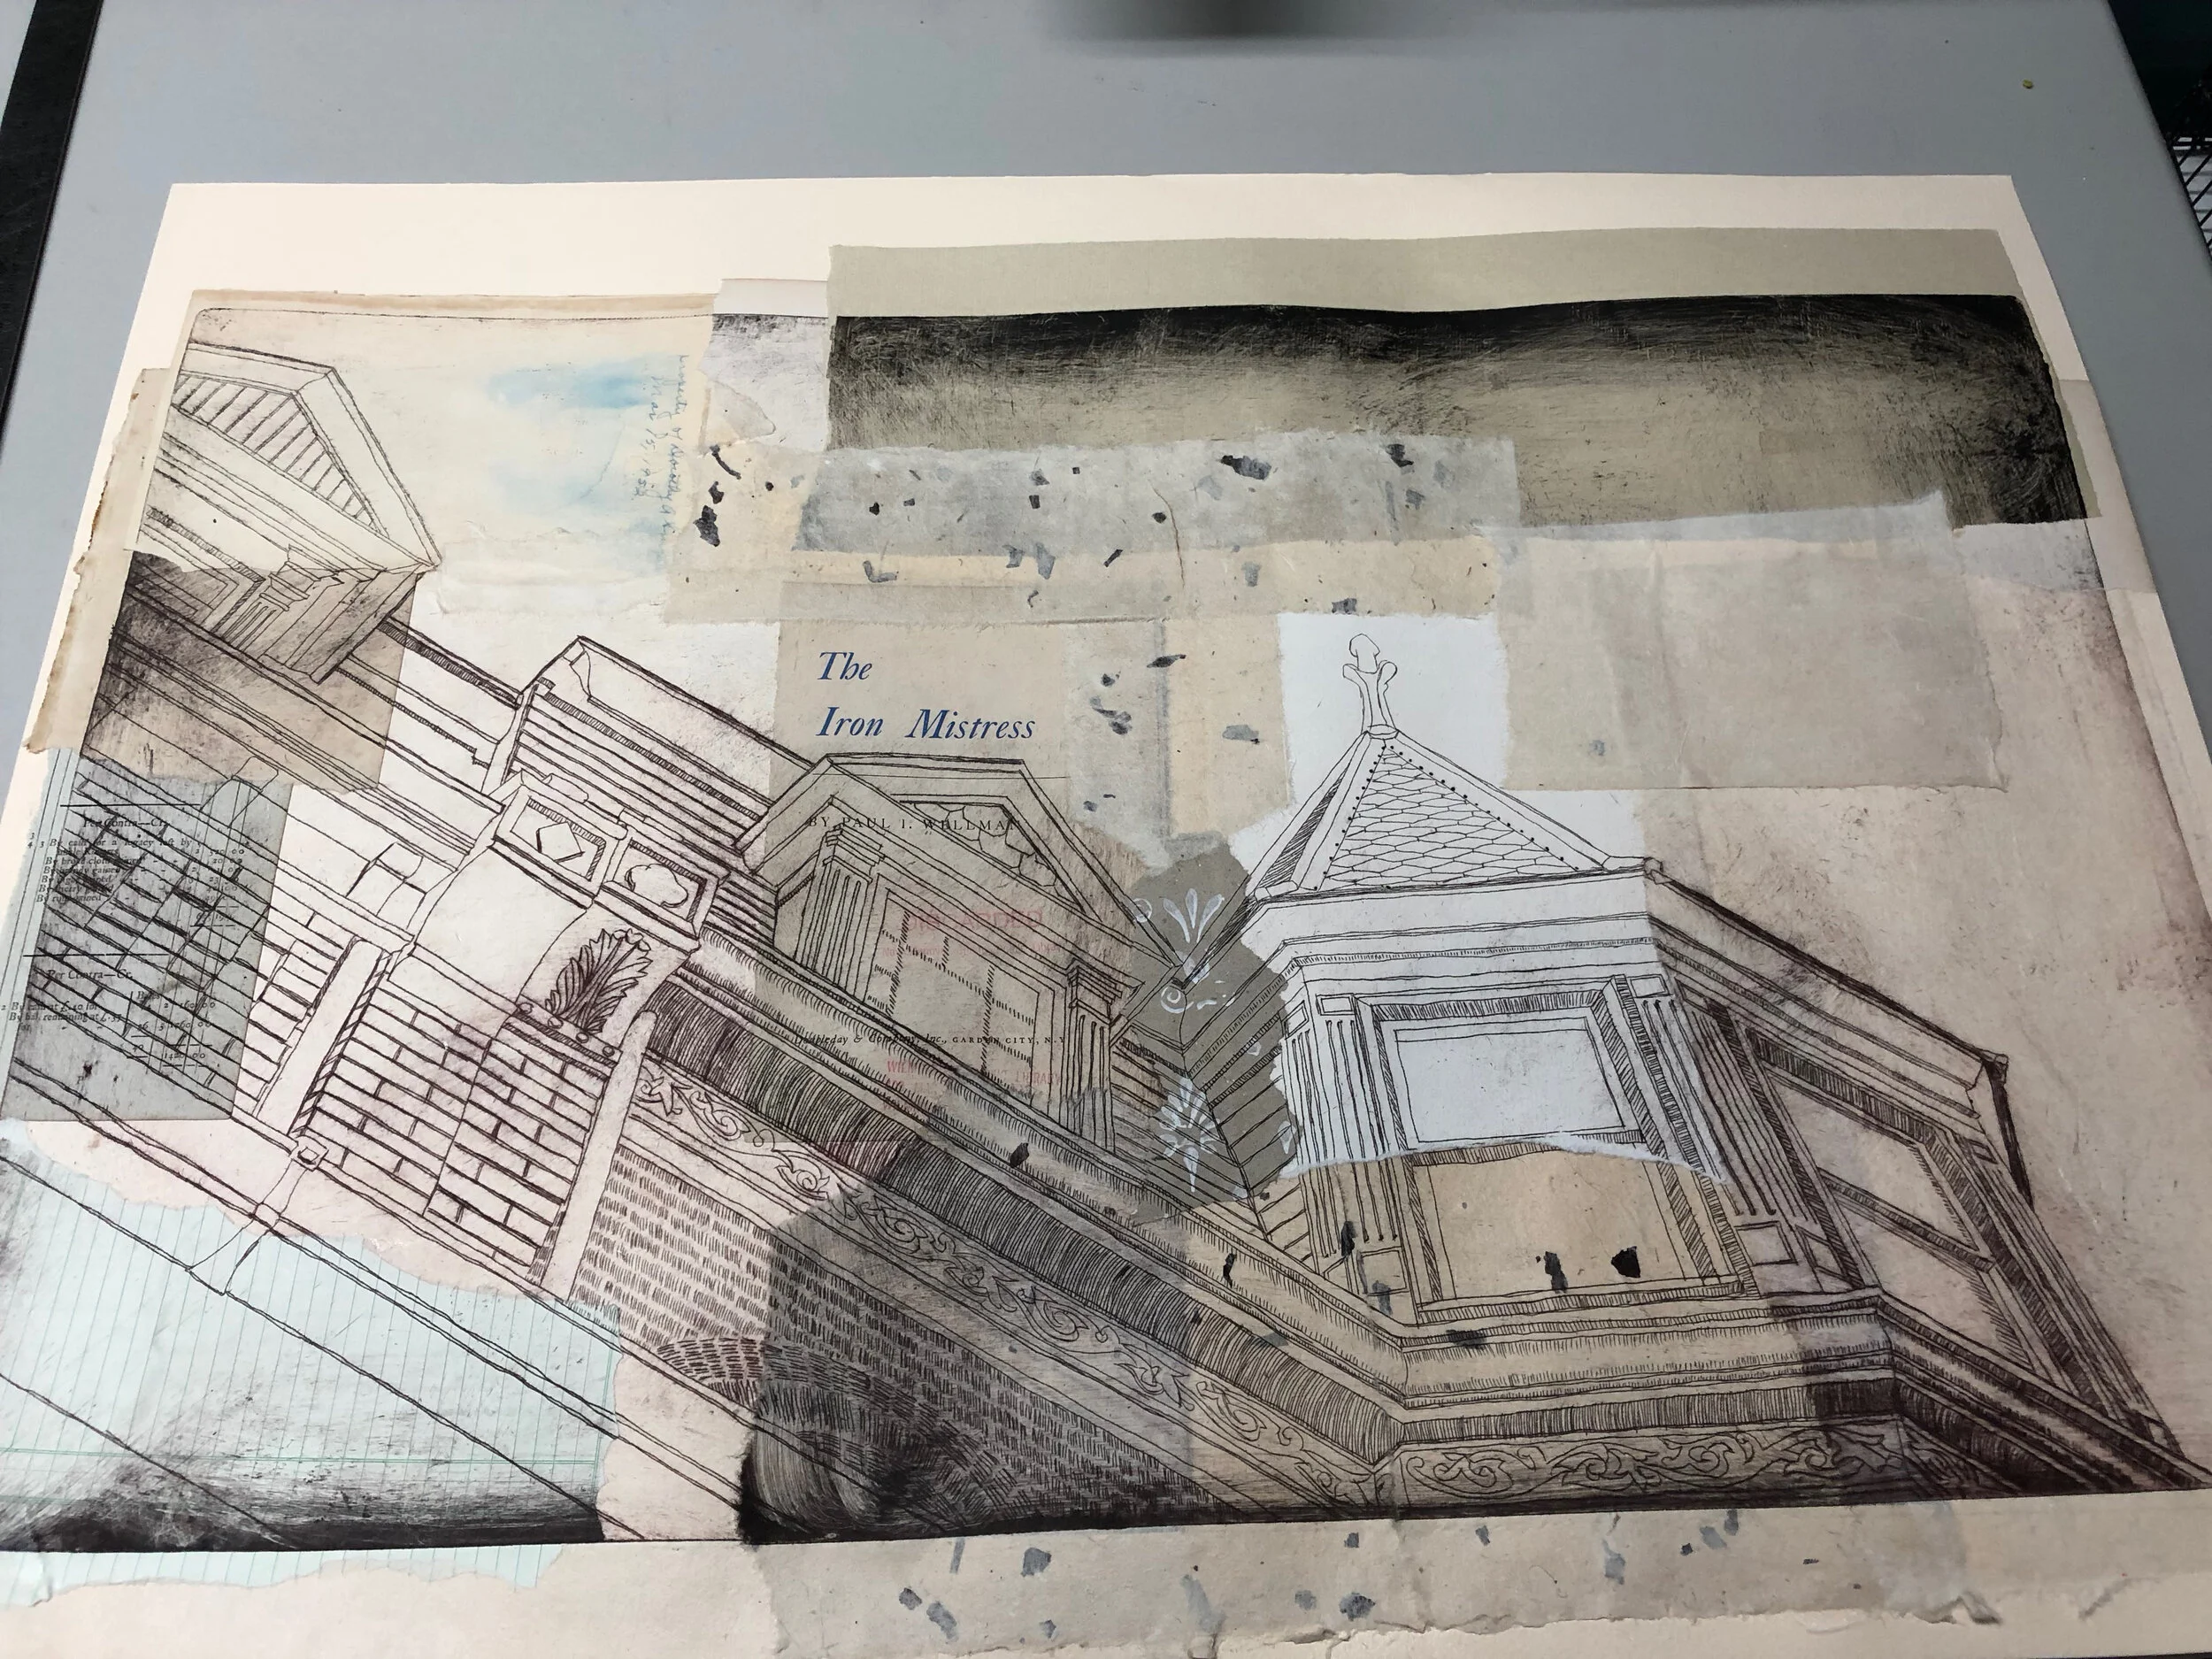
Collage showing variations resulting from different papers, ink colors, and plate tone
Once the collages were done, I primed each piece with clear acrylic on top, and colored them with thin washes of acrylic paint, being mindful to let the drypoint show through. Each piece was done differently, but kept within the color scheme I liked best from a Pinterest board I made to establish the dominant colors of the area.